Easter is fast approaching, and I want to put my new skills to use for the kids in the family. Someday I’d like to be able to sew bigger, more complicated stuffed animals. Today though, I’ll share my practice attempts at stuffed bunnies. Once I get the final ones completed, I’ll share those in another post.
My first bunny was the basic Martha Stewart Stuffed Menswear Bunny. I used adorable pink polka dot fabric paired with tiny flowers. ADORABLE for a stuffed spring bunny. The only modification that I made was to add a pocket to the front so that I could stick some Easter candy inside. Ok, so the cutting went smoothly, and the pinning seemed fine. Then I turned my bunny inside out and realized the pocket was sew into the inseam between the legs because I had made it too long. Whoops. Ok, I adjusted that seam a little, and stuffed the bunny anyway. I wanted to experience the WHOLE process, which was the only reason I forged ahead. The ears turned out fabulously and I loved the top. Other than the fact the arms ended up sewn into the head, not the body. I just can’t get past the wedgie I sewed into this bunny. I let Lucy kill it.
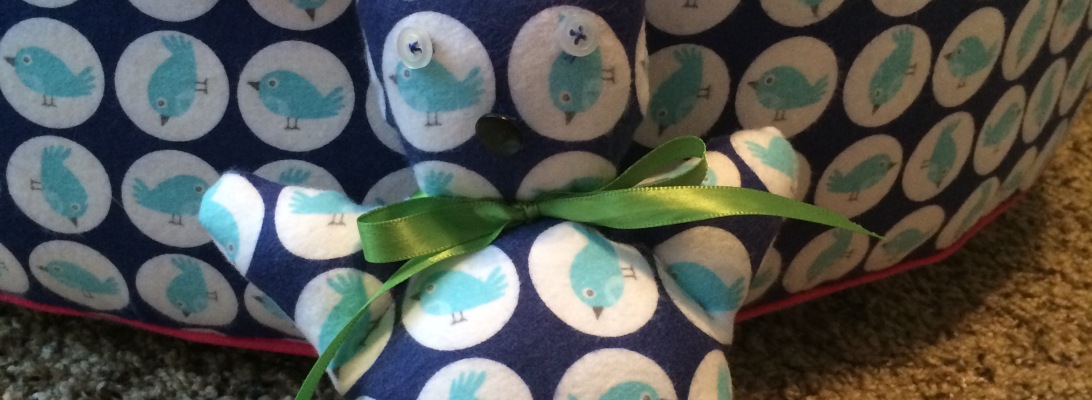
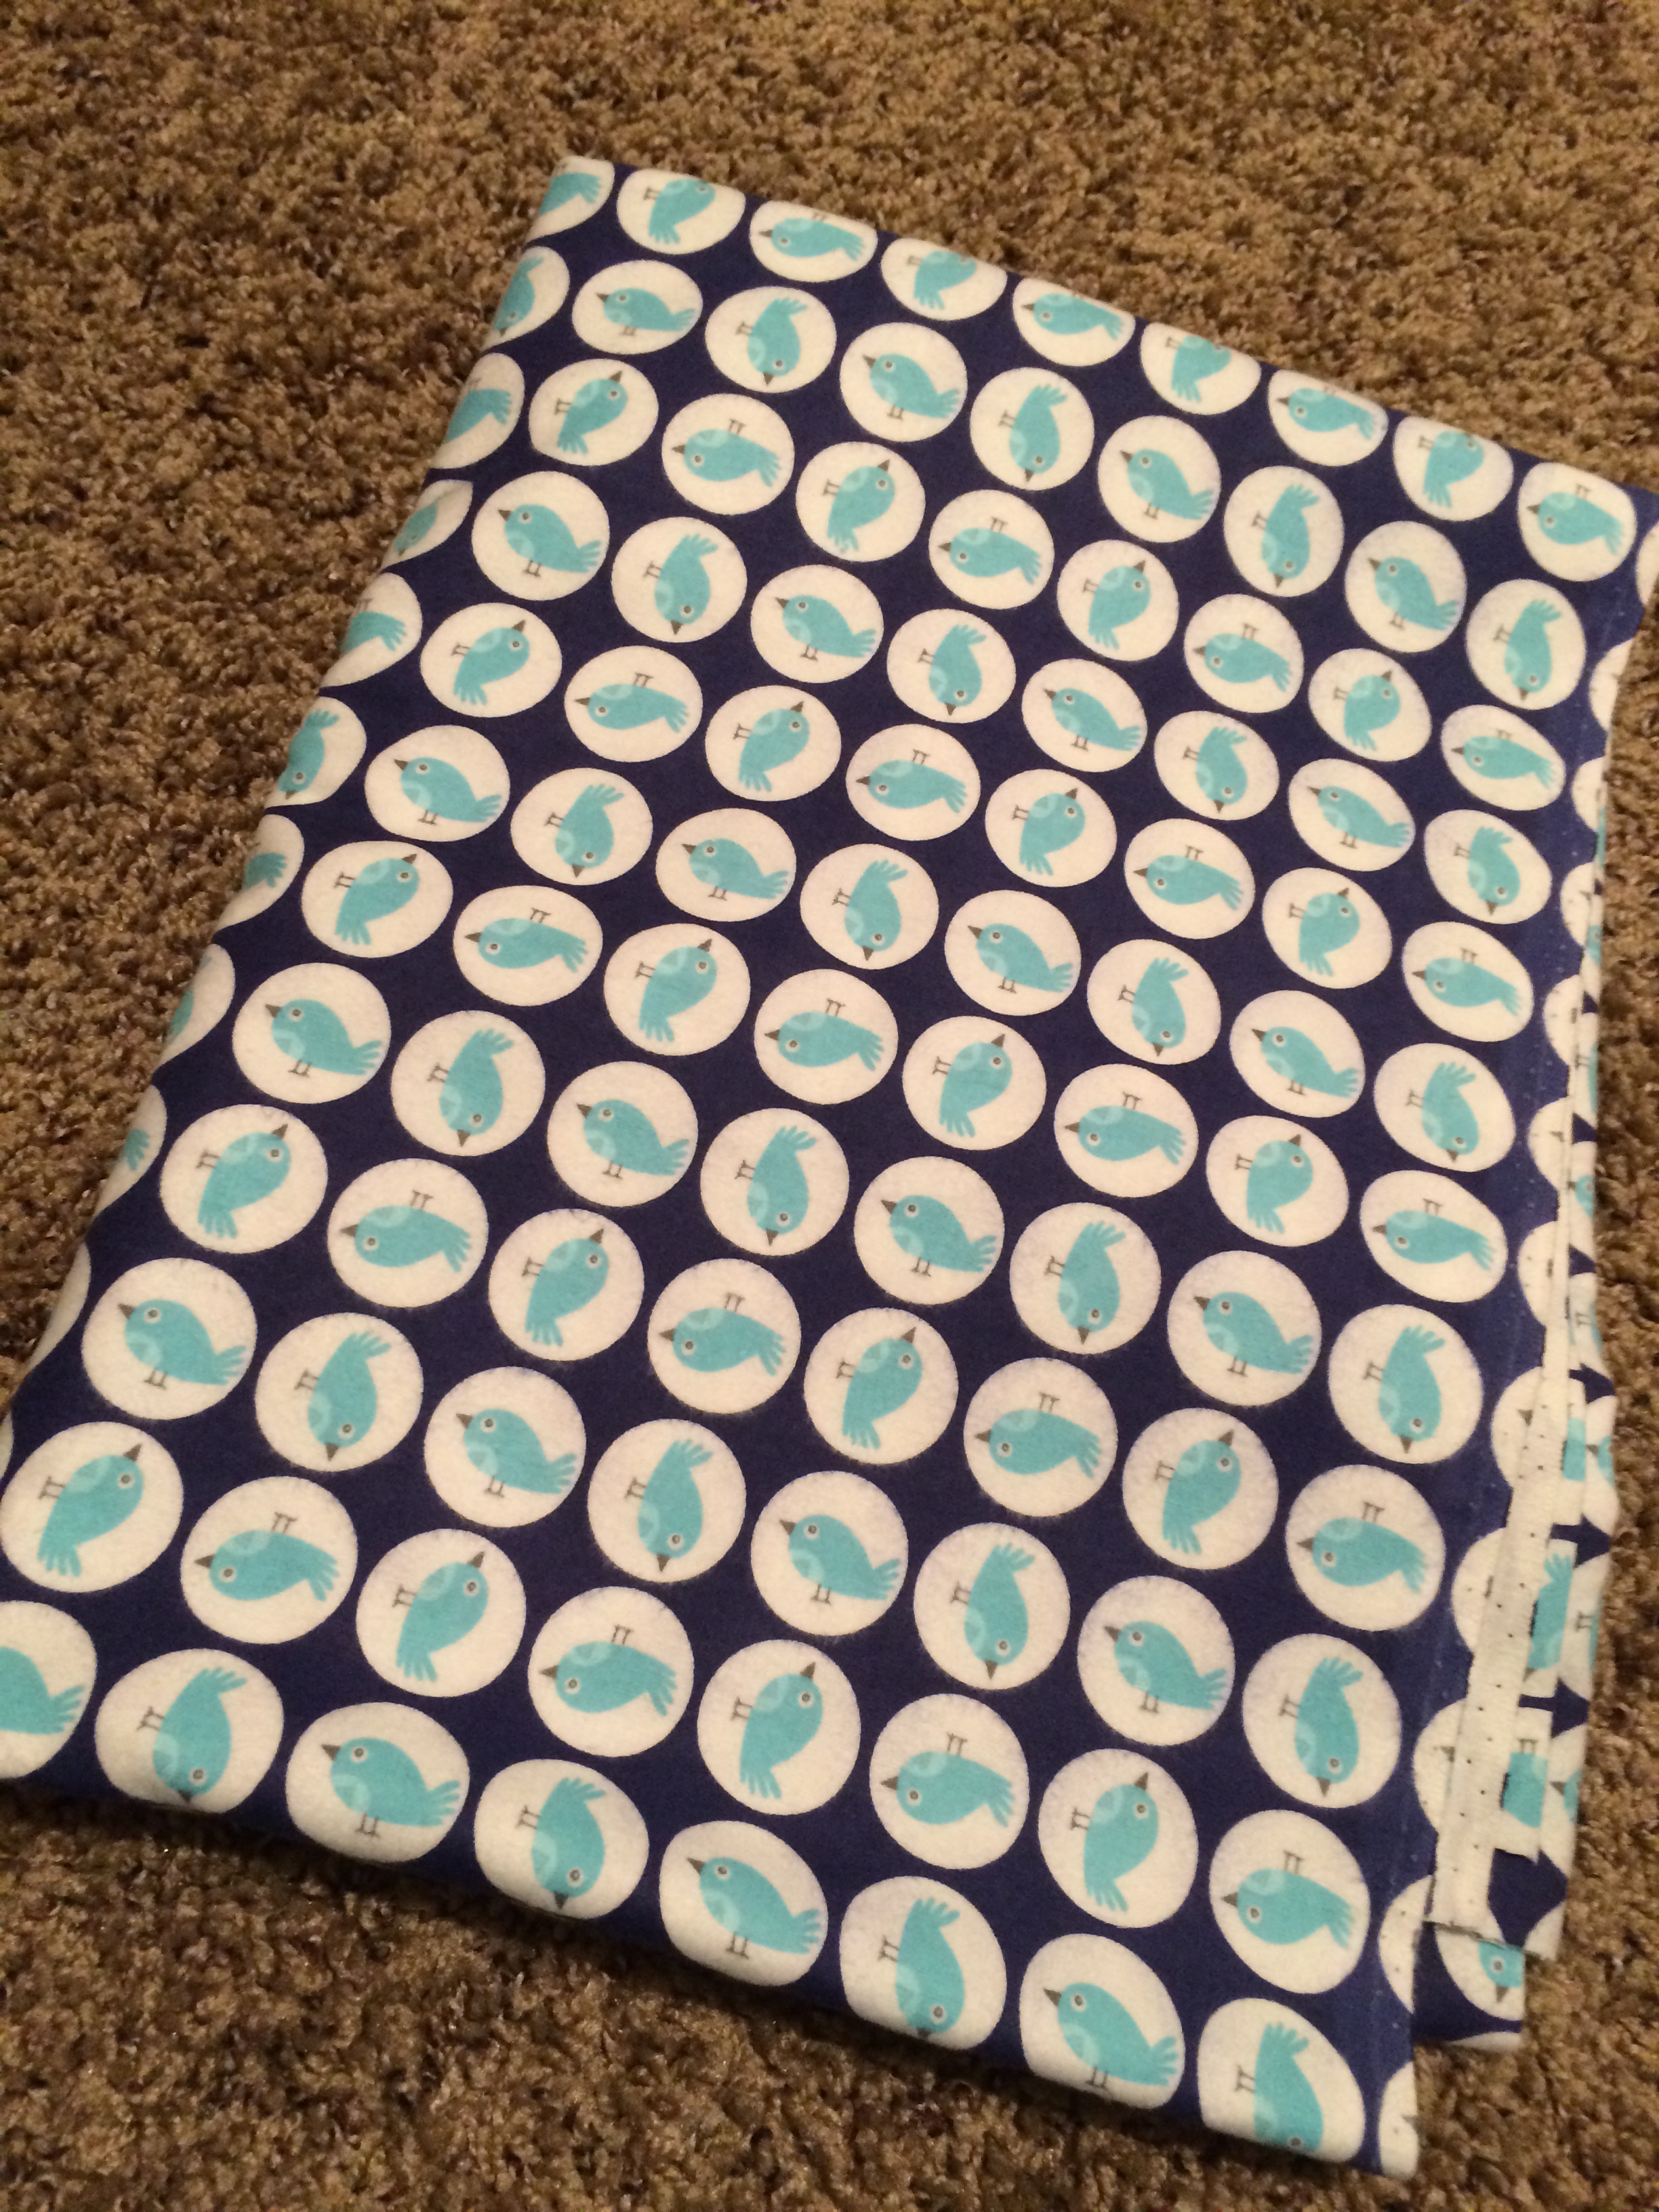
Bunny number two was a lot more successful. I love bunny number two – the Mooshy Belly Bunny. I used the left over bird fabric from my ottoman for this bunny, and cut some old running pants for the ears. When I turned this bunny right side out, I was so happy to see it was the right shape with no awkward glitches. Success! I spent the rest of the night stitching on button eyes, stuffing it, and finishing the seams. This bunny is staying with me.
My ultimate conclusion from these two experiments is that I need to be extremely careful when sewing stuffed animals to ensure proper shaping. I plan to use the mooshy belly body, but the menswear ears. I think I can successfully sew six of these by Easter Sunday. One a night until I’m finished….
If it’s not apparent, I waited to start this blog until I had a few projects ready to post. I am NOT cracking things out quite as fast as it may seem. I made this project a couple of weeks ago, and was surprised how simple it was!
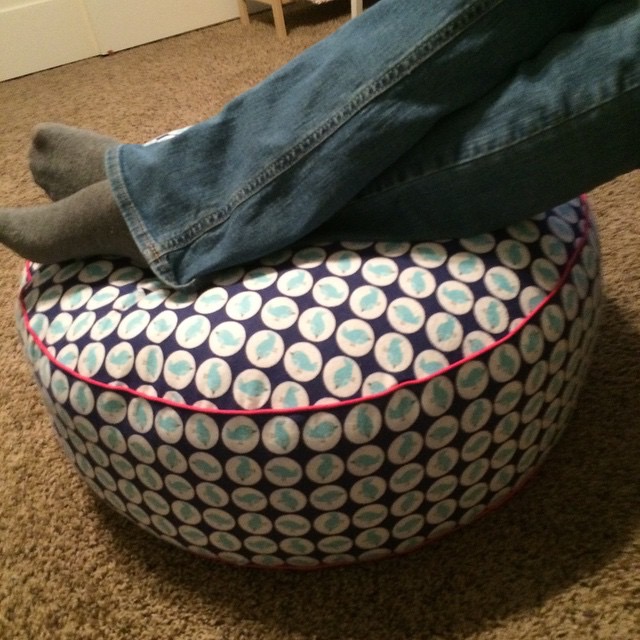
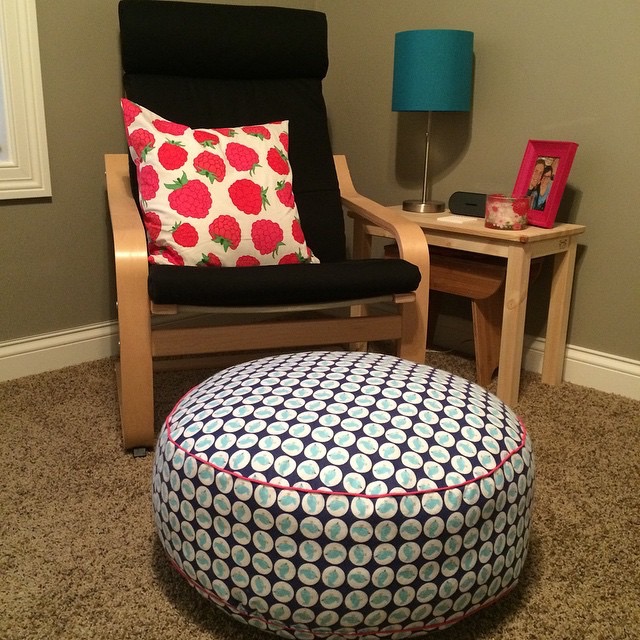
My husband and I bought our first home at this time last year, and one of the spare bedrooms was designated my craft room. I didn’t furnish it until the holidays, and even then I wasn’t spending time in there. I had a malfunctioning sewing machine, and I didn’t have anywhere comfy to sit for crocheting. What I was missing was somewhere to recline and put my feet up. Crocheting at my sewing table would not be cozy. My hunt for an ottoman began. I wanted something that was small and would compliment my handcrafted style in tones of teal/pink. I’m not specific or anything, am I?
As I became frustrated and sad at my missing ottoman, my friend Kathy sent me this pattern. Ok, I don’t have kids who need floor cushions. But I sure could re-purpose the concept as a smooshy ottoman! I was worried about taking on a task that involved sewing circular, using piping, and sewing something more three dimensional than a blanket. I can’t lie and say I didn’t lay awake working the concept over in my mind before heading to the store.
Luckily, I found the perfect fabric for the most “Lauren” themed ottoman. Teal birds. To which I could add pink piping. I LOVE birds on anything.
I didn’t think to photograph my process – sorry. Basically, I threw something perfectly circular down on my fabric and cut two circles. I then cut long strips of fabric and followed the tutorial I had bookmarked. The piping was surprisingly easy, even when sewing the final pieces together. The only hard part for me was stuffing it. I made this larger than the tutorial, so I felt like I just kept stuffing. And stuffing. Keeping the ottoman from looking lumpy definitely took some finessing. Once I sewed it closed and added it to my craft room though, I loved it. It fits perfectly with my style, and is super squishy and cozy. I do my blogging, reading, and crocheting sitting in this corner. I have to make on for my friend who sent me the pattern!
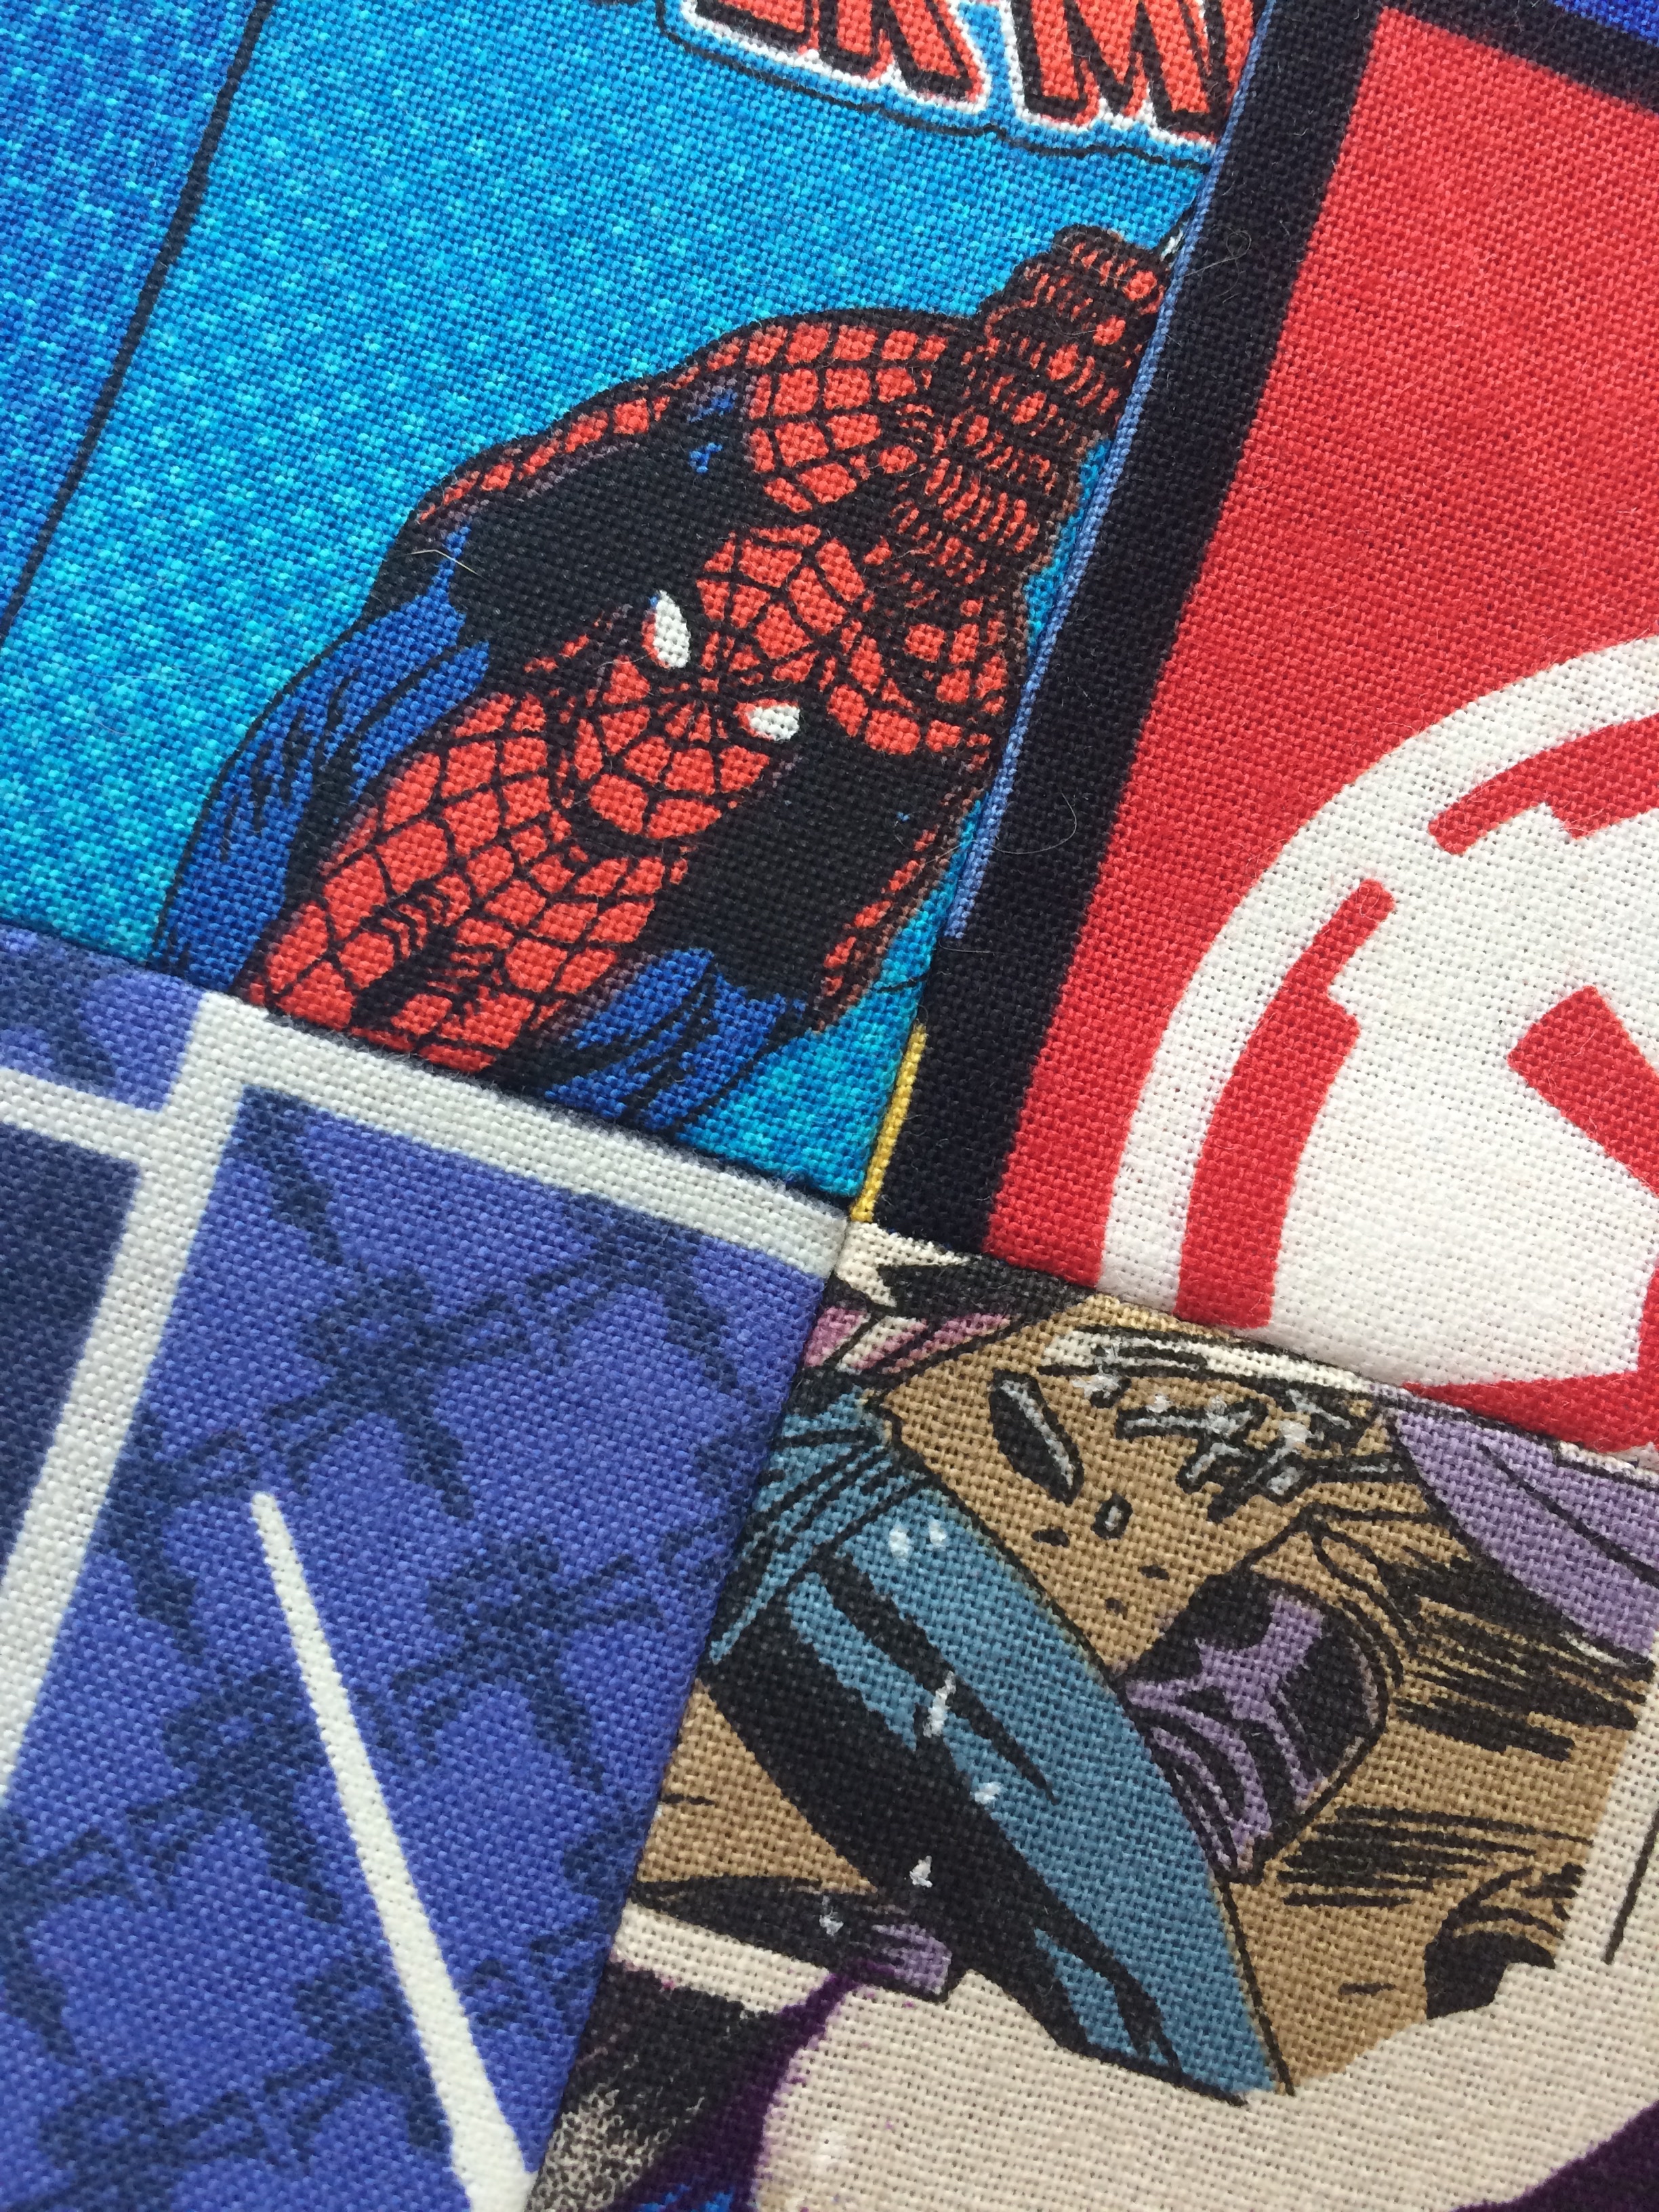
In my mind, my crazy mind maybe, I figured “hey the easiest thing to sew while learning is going to be a quilt!” I thought this because it was going to be all straight lines. Well, I wasn’t wrong about the straight lines. I was not right about it being easy. I decided to make my husband, Jake, a quilt featuring all of his favorites: Marvel Avengers, Star Trek, Star Wars, and Doctor Who. I know, I know, not all “super heroes,” but all fabulous science fiction characters. I went in search of a variety of fabrics with no idea what I was doing. I think at first I bought about two yards of fabric, only to need to go out a few more times along the way.
My cat, Maggie, guarding my fabric selections.My “pattern” planned out as crudely as possible on graph paper.
I spent hours cutting my fabric down to 6″ squares, and large 12″ Thor squares. Thor is my husband’s favorite, so he got the most representation on this quilt. After cutting it, it took me a few more trips to the store to have enough pieces, and then a few more hours of intense contemplation about how to manipulate my squares into the perfect pattern.
There were many variations that did not make the cut because the overall effect was not well distributed….
Once I was settled, I started in, pleasantly surprised at my first row. I grouped my squares to sew into larger squares, and then into rows. The first grouping only had to align with itself, so I didn’t give it a thought. I marveled at my neat corners and kept moving. Heck, I even gloated to myself at keeping my pieces with grids nice and straight.
One perfect set of squares.The beginning was easy for perfect corners…
Eventually I reached the point to need to sew two rows together. That almost brought me to tears. For all my careful measuring, and what I thought was careful sewing, my corners did not line up exactly from row to row. My husband told me he didn’t care, that it was my first project, so just keep going.
Sewing two full rows together was AWFUL.Don’t mind my ready-for-bed look here. I was overjoyed at having the majority of the front finished. All that remained at this point was the border
The final step on the front was the border. I searched online for a TARDIS fabric that would meet the dimensions that I wanted. Luckily I found gorgeous fabric. I winged this part. No measuring. I used the lines of the TARDIS as my guide and just went for it. It actually turned out really well! The only part I struggled with was around the corners.
Easy to cut thanks to the TARDIS being so nice and square!
So, at this point I thought I was going to sew my quilt back to my quilt front the same way I would smaller projects. I was planning to do this right sides together and then turn it right-side out. I was unsure how to get the batting inside like this, so I googled it. Thank goodness for the Internet is all I have to say. Yeah, quilts are sewn together with wrong sides facing in and the batting in place. Now, I will say I still did this oh so very wrong. I didn’t tape my layers to the ground and pin the crap out of everything. I had my husband help me lay out my three layers and straight pinned the edges. I now know how wrong this is and how extra hard I made my struggle. If I make another quilt, I will rely on masking tape and safety pins. I still don’t know what basting is, nor will I ever care. Sorry. But not really, I don’t care what basting is. I’m not going to share a pinning photo, because that took place late at night in my footie pajamas. Sorry, Internet!
Anyway, I managed to get my edges sewn beautifully and then forged ahead on a cross cross pattern over the top. I spent more hours with a meter stick and fabric pencil than I care to remember. I tried a few different ways, and a few different stitches before I settled. I went for simple criss cross in a basic straight stitch. Honestly, that was all I could handle. Luckily, thanks to my sewing class, I knew enough to investigate needles and set my machine properly for this task. My lines aren’t without some wiggle, but who really cares?
My first few rows of top stitching. I opted fora variegated thread instead of one that would blend in. I love the amount of color on this, so I wanted to add a little more.
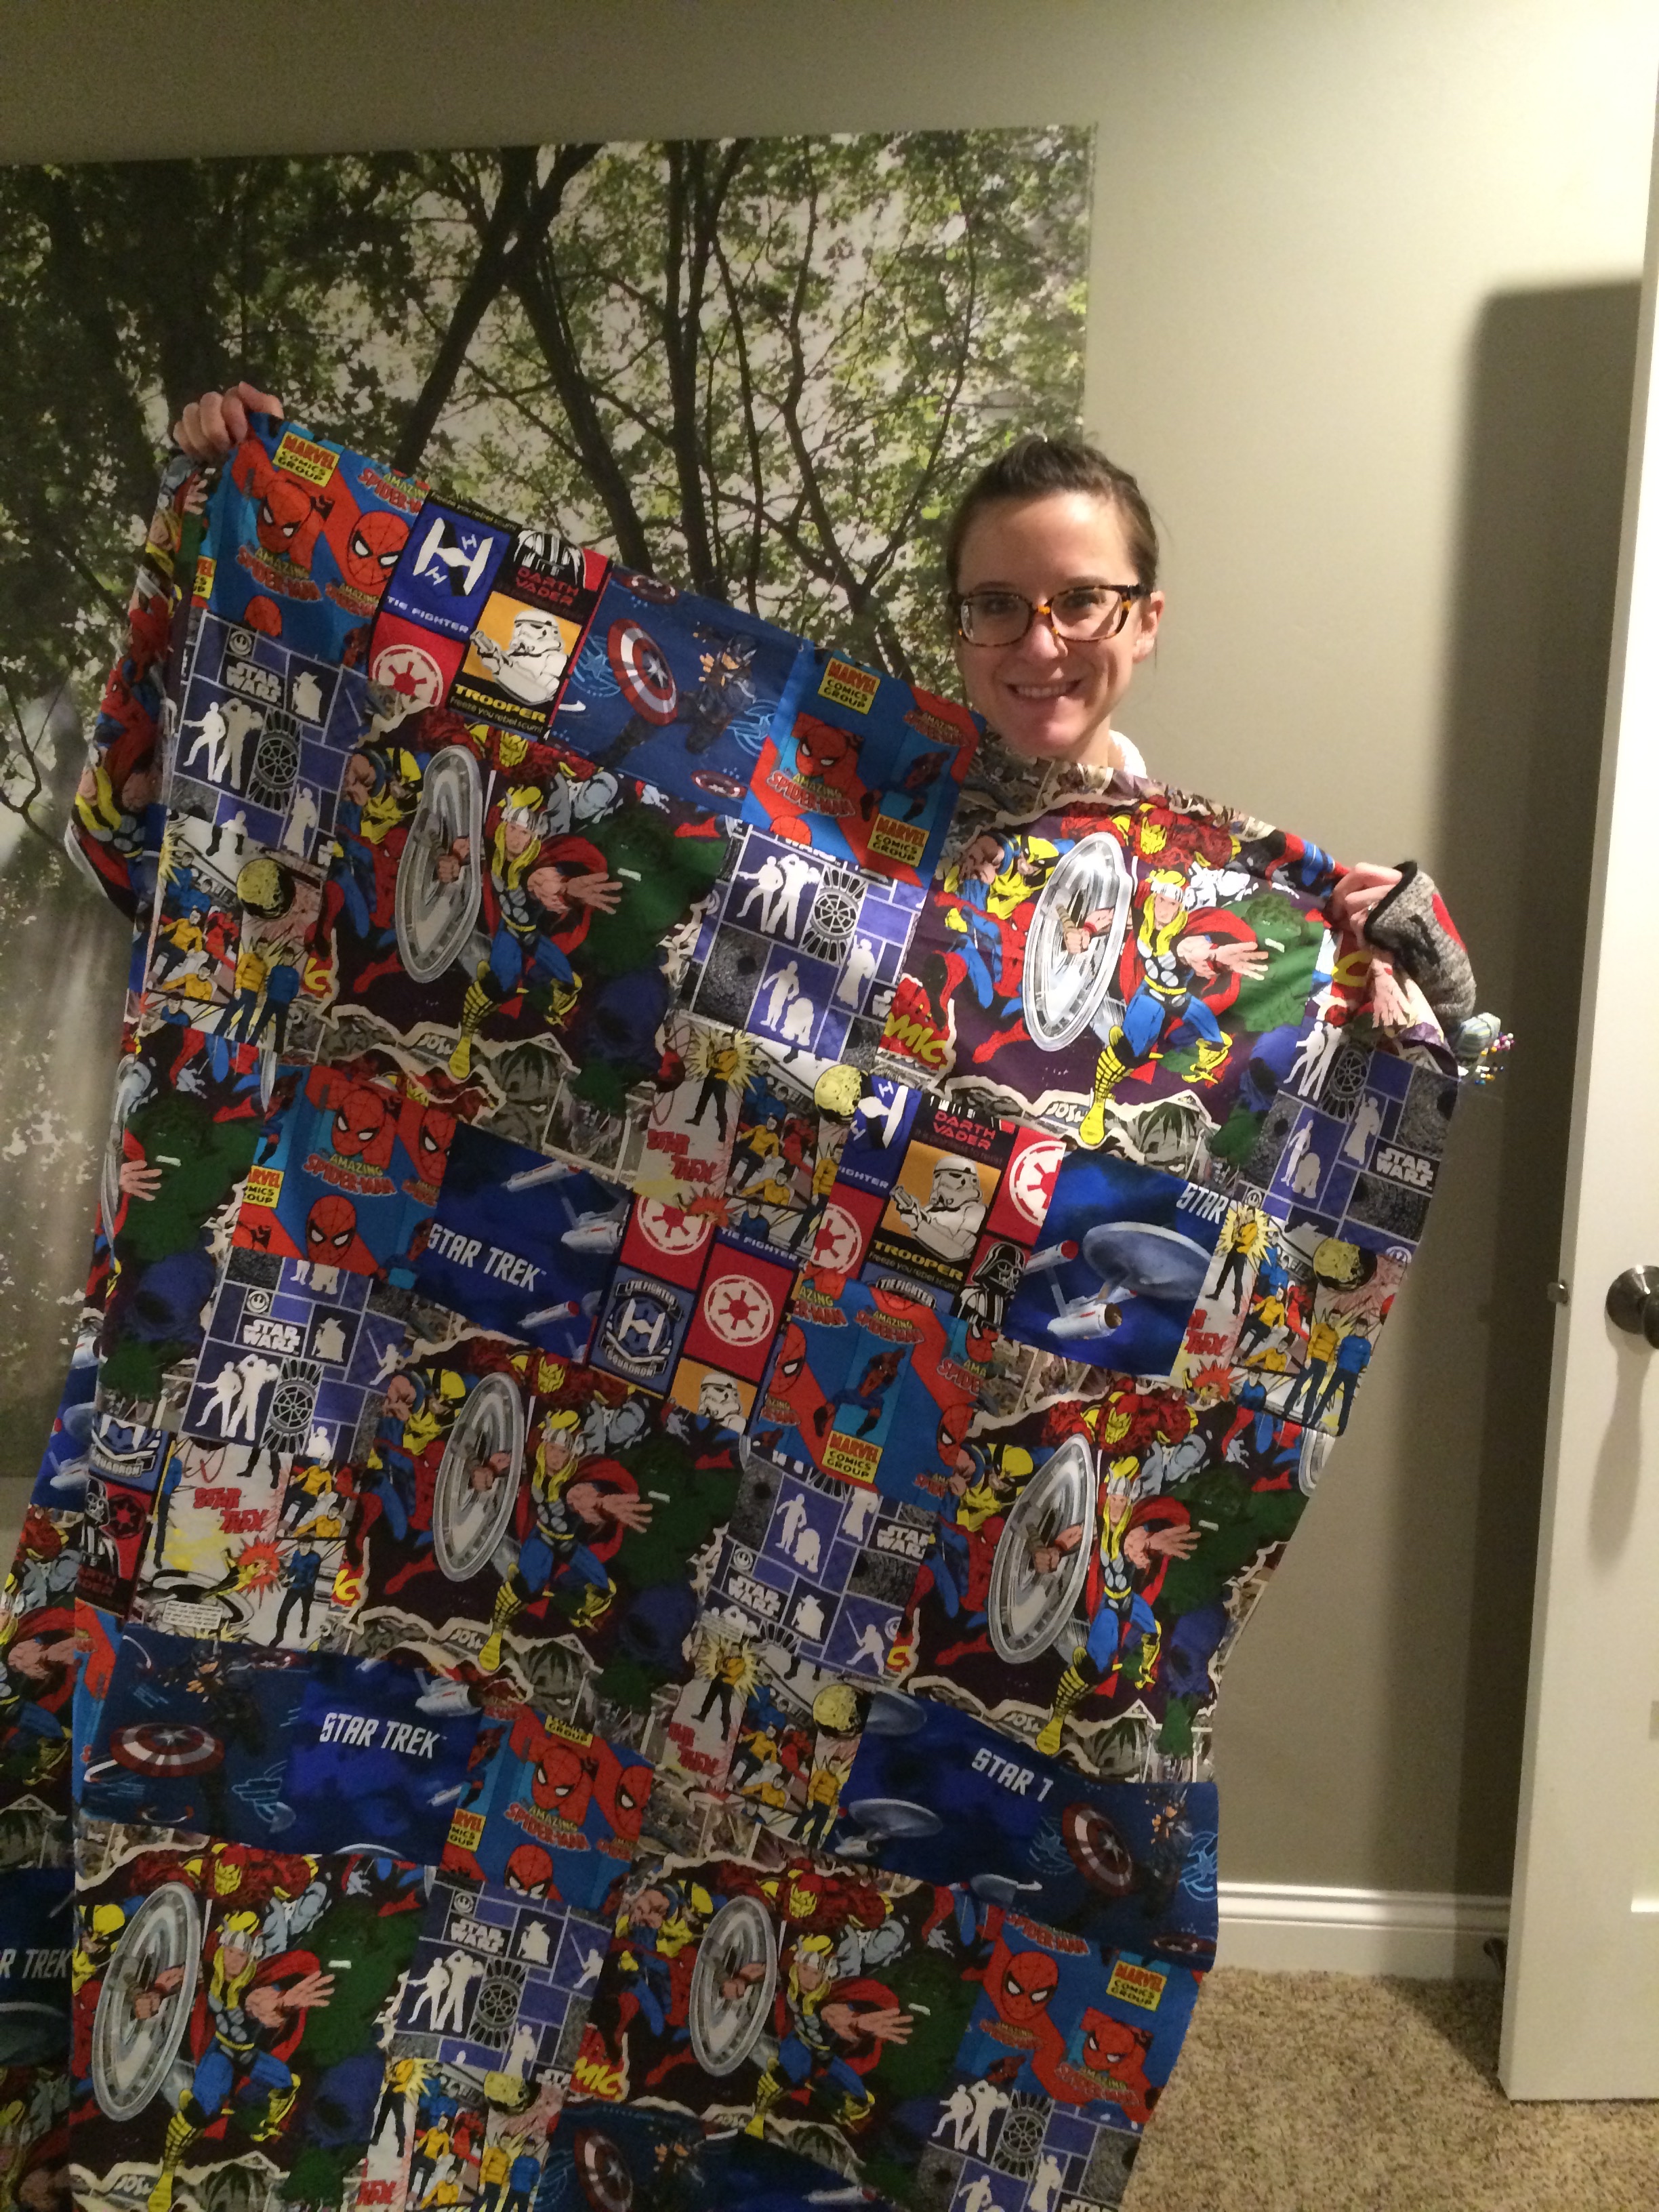
This part took the longest, and what seemed like the most thread. I was so happy with the way it turned out, and kept making my husband come in to look at it with me every few rows. Finally, though, I made it to the edging. This part was super easy and wicked fast compared to the rest of the project. Zip zip, edging complete. I love how this turned out, and my husband is a happy guy for having it!
Jake with his finished quilt!My cats seriously cannot stay off…The backside is plain Avengers. Nothing fancy going on there.We keep it on our couch. It has quickly become my favorite blanket to nap with. And it’s the size of a queen sized comforter, so it’s amazing.
Ok, so I guess now I can admit we are huge nerds. We like to dress up and go to Comic Con, which is why I went for this quilt motif. Happy sewing, everyone!
I love Robin and I love that TARDIS.My weird Ironman spandex suit, and my husband in his homemade Thor Costume.
Recently I bought a Viking Husqvarna Opal 670 sewing machine. Yes. I’ve dreamed of learning to properly sew for years. I had a Bernina machine that did not work – at least not for me. So that is sitting quietly in my closet while I explore all the potential of my new best friend. Luckily my machine came with four hours of lessons. I barely touched my machine for the week between the date of purchase and my first class because I was so afraid to use such a fabulous yet complicated device. After my first class though, I had no fear. I went right home and made an apron. Granted it was from a kit so I didn’t have to do any pattern or fabric selections, it was still the first thing I’ve sewn since Home Ec class almost 20 years ago. Now that I have a few projects under my belt, I can’t wait to keep trying everything I can, and document the whole process on this blog.
You may be wondering about this blog title. Quite simply, it’s a crafting blog. Not so simply, I have two cats who interfere with every project I work on. They lick my yarn, sleep in half finished blankets, and wrestle with my materials. I figure since they make an appearance in practically every photo I take of my crafts, they should make an appearance in my blog and the title. Get it?
Needless to say, sewing isn’t my first form of crafting. Otherwise, I don’t know how I would have dived head first into huge projects when my class was over. So, as part of my new blog, I’ll focus on those skills as well. Knit, crochet, and sewing. My old blog, which I killed, was a “life” blog covering running, cooking, crafting, and my marriage. While I am still happily married, still run, and still eat, I only want to focus this blog on crafts. Maybe if the mood strikes I’ll migrate some of my old craft posts over here since many of them were tutorials. For now, I leave you with my first sewn project – this simple apron.
 My first bunny was the basic Martha Stewart Stuffed Menswear Bunny. I used adorable pink polka dot fabric paired with tiny flowers. ADORABLE for a stuffed spring bunny. The only modification that I made was to add a pocket to the front so that I could stick some Easter candy inside. Ok, so the cutting went smoothly, and the pinning seemed fine. Then I turned my
 ![IMG_6305[1]](https://hooksneedlesandkittens.wordpress.com/wp-content/uploads/2015/03/img_63051.jpg?w=225&h=300) bunny inside out and realized the pocket was sew into the inseam between the legs because I had made it too long. Whoops. Ok, I adjusted that seam a little, and stuffed the bunny anyway. I wanted to experience the WHOLE process, which was the only reason I forged ahead. The ears turned out fabulously and I loved the top. Other than the fact the arms ended up sewn into the head, not the body. I just can’t get past the wedgie I sewed into this bunny. I let Lucy kill it.
bunny inside out and realized the pocket was sew into the inseam between the legs because I had made it too long. Whoops. Ok, I adjusted that seam a little, and stuffed the bunny anyway. I wanted to experience the WHOLE process, which was the only reason I forged ahead. The ears turned out fabulously and I loved the top. Other than the fact the arms ended up sewn into the head, not the body. I just can’t get past the wedgie I sewed into this bunny. I let Lucy kill it.
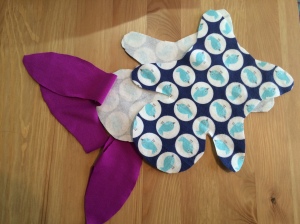 Bunny number two was a lot more successful. I love bunny number two – the Mooshy Belly Bunny. I used the
  left over bird fabric from my ottoman for this bunny, and cut some old running pants for the ears. When I turned this bunny right side out, I was so happy to see it was the right shape with no awkward glitches. Success! I spent the rest of the night stitching on button eyes, stuffing it, and finishing the seams. This bunny is staying with me.


![IMG_5837[1]](https://hooksneedlesandkittens.wordpress.com/wp-content/uploads/2015/03/img_58371.jpg?w=221&h=292)


